Difference between revisions of "Gear Inspection Module"
From ArcoWiki
(Created page with " Category:ReadMe3.6") |
|||
| (2 intermediate revisions by one other user not shown) | |||
| Line 1: | Line 1: | ||
| + | [[File:Gear_reducer.gif|thumb|right|400px|''https://en.wikipedia.org/wiki/Gear#/media/File:Gear_reducer.gif'']]<br /> | ||
| + | The gear package in Arco allows the measurement of [https://en.wikipedia.org/wiki/Gear Spur and Helical gears] with a CMM.<br /> | ||
| + | The measurement can be performed with: | ||
| + | *Point to Point (trigger) probe | ||
| + | *Continuous Scanning Probe | ||
| + | *[[PH20]] | ||
| + | <br /> | ||
| + | <br /> | ||
| + | By input the nominal data of a gear, Arco produce a program specifics for that gear automatically. <br /> | ||
| + | The preview allows the user to select all the metrologycal parameter for gear inspection such us: | ||
| + | *Limits and number of points for of the Involute | ||
| + | *Limits and number of points for if the Generatrix | ||
| + | *Safety radius for auto probe change | ||
| + | *Identification of the teeth to be measured | ||
| + | *Height of the gear | ||
| + | *Type of alignment within | ||
| + | **Current Reference System | ||
| + | **Plane and Cylinder | ||
| + | **Cylinder | ||
| + | **Synchronization of the tooth only | ||
| + | <gallery widths=400px heights=400px caption="Gear Program Definition"> | ||
| + | File:gearDefinition.png | ||
| + | File:Probe Selection.png | ||
| + | File:Full measuring Preview.png | ||
| + | </gallery> | ||
| + | |||
| + | <br /> | ||
| + | <br /> | ||
| + | |||
| + | |||
| + | Based on the parameter ARCO creates a full program with all the points to be takes and the correct alignment procedure.<br /> | ||
| + | At the end of the execution is generated a PDF report that goes with the international standards, the parameters evaluated are: | ||
| + | *Profile Error (Fa,ffA,fHa) | ||
| + | *Flank Error (Fb,ffb,fHb) | ||
| + | *Quality Class | ||
| + | *Left and Right Pitch Error (fp,Fp) | ||
| + | *Thickness and Run-out (Ues,Aes,Les,Fr) | ||
| + | |||
| + | <gallery widths=400px heights=400px caption="Gear Report"> | ||
| + | File:GearReport1.png | ||
| + | File:GearReport2.png | ||
| + | |||
| + | </gallery> | ||
| + | |||
| + | [[it:Modulo di controllo dell'ingranaggio]] | ||
| + | [[zh-cn:齿轮检测模块]] | ||
| + | [[pt:Módulo de Inspeção de Engrenagens]] | ||
| + | [[de:Zahnrad Inspektionsmodul]] | ||
| + | [[es:Módulo de inspección de engranajes]] | ||
| + | [[en:Gear Inspection Module]] | ||
| + | |||
| + | [[Category:Help_On_Line]] | ||
[[Category:ReadMe3.6]] | [[Category:ReadMe3.6]] | ||
Latest revision as of 15:05, 6 June 2018
The gear package in Arco allows the measurement of Spur and Helical gears with a CMM.
The measurement can be performed with:
- Point to Point (trigger) probe
- Continuous Scanning Probe
- PH20
By input the nominal data of a gear, Arco produce a program specifics for that gear automatically.
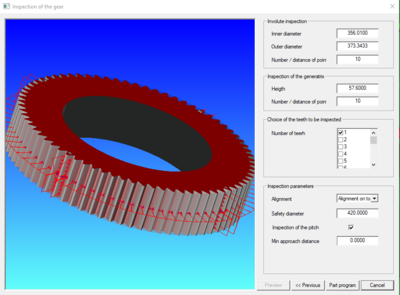
The preview allows the user to select all the metrologycal parameter for gear inspection such us:
- Limits and number of points for of the Involute
- Limits and number of points for if the Generatrix
- Safety radius for auto probe change
- Identification of the teeth to be measured
- Height of the gear
- Type of alignment within
- Current Reference System
- Plane and Cylinder
- Cylinder
- Synchronization of the tooth only
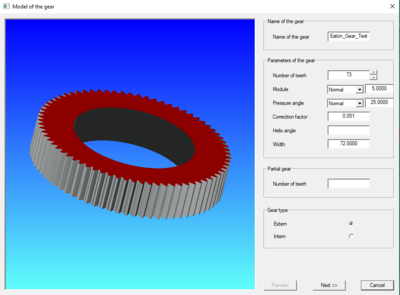
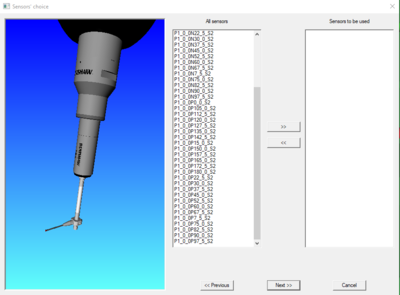
- Gear Program Definition
Based on the parameter ARCO creates a full program with all the points to be takes and the correct alignment procedure.
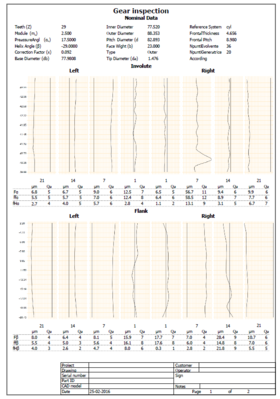
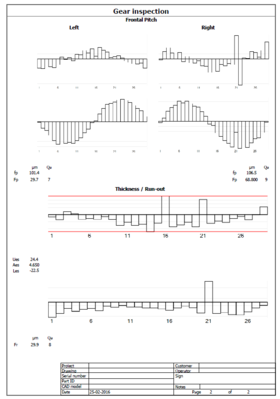
At the end of the execution is generated a PDF report that goes with the international standards, the parameters evaluated are:
- Profile Error (Fa,ffA,fHa)
- Flank Error (Fb,ffb,fHb)
- Quality Class
- Left and Right Pitch Error (fp,Fp)
- Thickness and Run-out (Ues,Aes,Les,Fr)
- Gear Report
